build diary
<< | show individual entries | >>April 4, 2004: 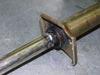 A tube is welded over the stock shaft.
It's welded around the end of the tube as well as spot welds through a couple of holes.
entry 214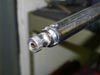 After the shaft is fitting to the car, the tube is cut to length.
The splined end of the steering shaft is welded into place.
entry 215 The final steering column, ready to reinstall.
entry 216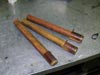 ...and for something a little different, here's why the seat in my Cadillac wouldn't slide forward! Some flares were wedged underneath - flares from 1978.
entry 217
April 8, 2004:
Well, the steering shaft is in place.
It's the perfect length. By that, I mean that if it was 1mm longer it wouldn't have worked! Whew. I might still move it slightly to move the steering wheel closer to the driver. There's adjustment in the column to lengthen it if I need to. At full lock, there's a bit of flex in the column that is not good. I picked up a teflon pillow block yesterday to help out here. I also got my big red starter button and I've been spending more time looking at the dash and pondering. Switches may end up on the transmission tunnel. Hey, if it works for a WRC car...
The driver's seat is bolted in place now so I am making some progress. The Cadillac now has a newly rebuilt carb, too. There are a lot of parts in a four-barrel with an automatic choke!
entry 218
April 11, 2004:
The welding is done with the steering, and I should have it fitted in a couple of hours.
The teflon pillow block will also be going on. It's hard to hold a teflon ball in a vice to drill it! The work has gone well, with the tie rods going together well once I had all the parts on hand.
Still no indication of what the parts coming from CMC might be or when they'll show. That fuel cell was supposed to ship back in December...
entry 219
 The driver's seat with harnesses.
There's no really good place to install the shoulder straps. The cross bar that CMC installed is not as strong as I'd like and the square cross section makes it a bit ugly for wrapping straps around. Using the tube that's provided for a bolt puts all the stress in the wrong place - my tube was welded in the wrong place.
entry 220 Time to make some tie rods!
The Miata ones are obviously too short thanks to the shortened rack. With the front wheels parallel (measured off the brake rotors), I centered the rack and then checked the length of tie rod needed. Much to my delight, the measurement was the same to the millimeter on each side.
entry 221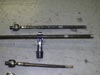 The first modified tie rod is on top.
The pipe in the middle has the threaded fitting pressed into place (awaiting a weld) and an unmolested stock Miata tie rod is on the bottom. I left about 6" (15 cm) of the stock tie rod inside the tube for extra strength and put a few spot welds along the length.
entry 222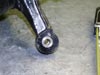 In order to fit the 7/16" bolts into the tapered ball joint bolt in the steering knuckle, I drilled the hole out to 9/16" and put in some bushings that we use for a Flyin' Miata part.
They're a nice snug fit and the stainless steel will resist wear nicely.
entry 223
April 12, 2004:
The steering is all in place and functions.
It's childish fun being able to sit in a seat, turn the steering wheel and see the wheels move back and forth - but I don't care! The teflon pillow block was used in place of the intended rod end to support the column. Rod ends of that size are very expensive. The teflon part cost me $6 and I drilled it out to the exact (metric) diameter of the steering column. The bracket on the frame had to be extended to make it fit but that was easy to do with a piece of aluminum.
I've also had a bit of a puzzling time with front suspension. When setting up for the tie rod measuring, I discovered that one side of the front suspension was binding. I swapped the upper arms from side to side - and discovered that I had one of them installed backwards! Whoops. I installed them both the same way and they worked well. Since I don't have instructions, I had to look at the photos of the GRM build and discovered that now both of them were backwards. Once they were installed correctly, both sides still worked smoothly. I can't explain it. But it works. So, what's next? Probably the dashboard.
entry 224
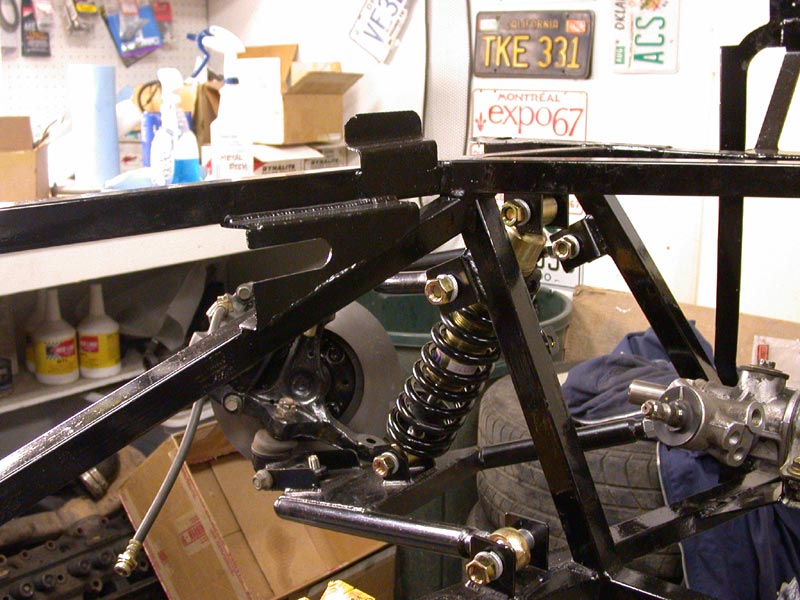
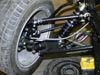 The finished front suspension.
The silver tubes are not part of the suspension, they're a header.
entry 225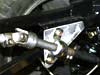 The teflon pillow block that supports the steering column.
I had to extend the bracket on the frame in order to make it fit.
entry 226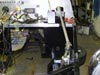 The steering column leaves lots of room for the engine.
And yes, my accelerator pedal is held on with vice grips.
entry 227
April 13, 2004:
Whoohoo!
My fuel cell showed up! It was shipped from JAZ on the 8th. It's a nice looking piece but I don't know how it will fit yet. It is foam filled and has two AN-8 outlets - that's a huge flow capacity! I'm not sure if I'll set up a surge tank like a proper race car or simply use one of the two pickups. Maybe I'll start with one and see if fuel starvation becomes a problem on the track. The pickup location combined with the foam should make it pretty safe. CMC told me the tanks were custom-made, but it appears to be an off-the-shelf tank. The part number confirms this. If I'd known that, I could have had the cell months ago for less money from JEGS. There's also a 5 gallon that might have made a nice compromise between range, weight and cost. No matter what, the arrival of the tank means I can push ahead on a lot of fronts that have been held up.
I pulled the MOMO steering wheel out of my Miata last night to get some final measurements for the steering wheel location. I've got a plan on how to build the adaptor and put the wheel right where I want it. Lots to keep me busy! Oh, I also managed to grab a billet aluminum oil filler cap from a junkyard motor that showed up at work. Aluminum is a dumb idea for an oil filler cap (think about heat transfer) but it's low profile and will help clear the hood.
entry 228
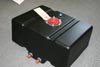 The fuel cell is here!
entry 229
April 14, 2004:
Turns out that Summit sells the same fuel cell under their own brand as well.
The tank fits into the car nicely, but it's a squeeze getting it into place. I had to remove a couple of fittings. No problem there! Since the sump on the bottom of the tank means that the tank isn't flat, I'll have to build some supports for the front of it. Easy enough to do. Last night was spent reading up on surge tanks and generally poking around the back of the car. Ooooh, I'm ready to a lot of work now!
entry 230
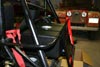 The fuel cell in place.
It's a bit difficult to get in place, but it's nicely sized.
entry 231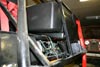 The sump for the fuel pickups means I'll have to make a support for the tank.
Easy enough.
entry 232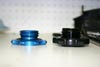 My new, low-profile oil filler cap.
Every little bit helps!
entry 233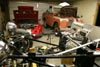 Everybody wants a bit of attention.
entry 234
<< | show individual entries | >>