build diary
<< | show individual entries | >>October 24, 2004: 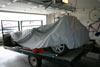 Although the Seven uses Miata mechanicals, it doesn't wear a Miata car cover very well.
entry 641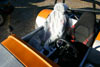 Yuk.
Yuk.
While the seats stayed dry through the snow, the rest of the car was covered in road goo. The roll bar, the steering wheel, the scuttle and the transmission tunnel were all covered. How did this car get so dirty so soon?
entry 642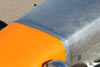 They don't call it "racer tape" for nothing! This was a successful attempt to keep the hood from bulging at speed.
entry 643 Out on the track.
entry 644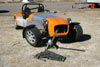 Alignment changes in the "pits".
entry 645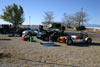 Some of the other participants.
Stock Miatas, turbocharged Miatas, supercharged Miatas - everyone very consistent to drive around and a pleasure to share a track with.
entry 646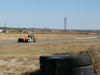 It's difficult to tell, but this is hard braking.
Not much dive.
entry 647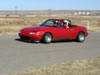 Dave proves to yet another passenger that they drive like a wuss.
Like he did with me. In exchange, we made fun of his lowrider slicks.
entry 648 After my ride with Dave, I went faster.
Thanks to Geremy Kornreich for taking this and other shots of the car in motion!
entry 649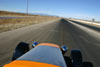 The front straight.
Does it look like a drag strip? It is. Geremy took this photo with his arms in the air - your sightline is usually a little lower.
entry 650 Yours truly, grinning like a madman under the helmet.
entry 651 Hard at play.
entry 652
October 27, 2004:
The reason for the clutch failure at the track is obvious now that I've untaped the hood and looked at it.
The upper mounting bolt for the slave cylinder got away. This let the slave rotate around when the clutch pedal was depressed. The piston came out, cocked sideways and jammed the whole assembly with the release fork slightly moved. Thus the slipping clutch and all the escaped fluid. All I need to do is fix the damaged threads in the bellhousing and replace the piston for the slave. The latter is part of the $9.95 rebuild kit I bought yesterday so it's a cheap fix!
There's another new build website up: Chris Flaccone's Hyabusa-powered beast. I need to put together a list of builds similar to mine.
entry 653
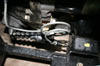 The cause of the clutch failure.
The upper mounting bolt for the slave escaped, the slave cocked over and the piston jammed the release fork partway out.
entry 654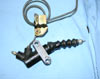 A little work on the hydraulic lines and a new piston for the slave cylinder and I'm back in business.
entry 655
October 29, 2004:
The plan for this weekend? Work on the windshield.
I picked up some 1/2" channel to go around the outside edge of the glass and I'll be chopping up plywood to make a template. I may have found the missing wiper pieces from a Mini and so I'll soon be able to drive without glasses. Maybe I'll also spend some time fixing the clutch so that I can actually drive as well.
On a less exciting note (well, less exciting to those who get excited about aluminum channel) I spent a bit of time working on the software for the website. You can now read the updates and look at the photos in chronological order. It's not such a big deal for those who read the updates every day but it should help the new visitors. Oh, and for those worried about CMC's responsiveness - I emailed Steve to give him an update on how the car behaved on the track. He responded within hours.
entry 656
October 31, 2004:
A good day to be working on an orange and black car, really.
I spent the day working on the windshield. A pattern was cut out of 3/8" plywood and then sanded into shape. I'm not great with wood - not enough patience, if you'll believe it! - but I'm pretty happy with the end result. It's not a fine piece of furniture by any means but the shape is right. I used welding rod to transfer the shape of the scuttle to the plywood. That was the part that concerned me the most but the rod proved to be just the trick.
entry 657
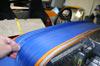 In order to transfer the shape of the scuttle to the windshield template, I grabbed a couple of pieces of welding rod.
The blue tape is there to protect the paint of the scuttle.
entry 658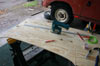 Cutting out the windshield template.
It's about 12.5" high in the middle. Note the colourful plastic protractor and compass - it's like being back in school. The compass has a "safety point" to protect me from myself, unlike the ones I remember.
entry 659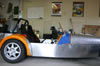 The final height of the windshield.
entry 660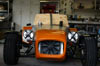 From the front.
I'm fairly happy with the appearance of the windshield although I'm hoping the final result will be a little more transparent.
entry 661
<< | show individual entries | >>