build diary
<< | show individual entries | >>July 23, 2004: 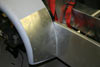 Rear fender shield in place - but I did the measuring on the left side.
Turns out there's a small difference in the shape of the right fender at the bottom. I'll be able to tweak that easily then round off the corners.
entry 504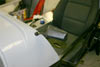 An installed mirror.
entry 505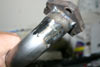 Cleaning up the welds on the header.
By the time I'm done, it will look like a single pipe. The reflections make it look as if I've really cut down the thickness of the pipe!
entry 506
July 26, 2004:
It was a weekend of fine detail work.
Lots and lots of sanding on the fibreglass body parts to prepare them for painting. They're very high quality and needed almost no touching up - except for the two extra holes I drilled in one of the front fenders. Whoops. So that had to be patched. I also spent some time grinding down the welds on the exhaust to make everything look good. The side panels have been cut to clear the exhaust and they're now installed. It's getting very close - the only large jobs left are the painting and the exhaust. Then it's all down to troubleshooting and tweaking.
entry 507
 I had to redrill a couple of holes in one fender.
This meant patching the fibreglass.
entry 508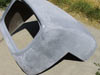 Getting the nose ready for painting.
entry 509
July 27, 2004:
No major progress to report.
Some pinholes in the exhaust welds have been filled and now I have to spend a little more quality time with the grinder. One thing I don't believe I mentioned - the only part of the stock exhaust manifold that was retained was the flange. The collector was shelved and replaced with one from an unused Miata race header. It's larger and constructed with more attention to the flow. The body parts are now off at the paint shop. The final colour scheme is the orange and black you can see in this mockup. That should be finished this week as should the exhaust. Then it's a matter of a half hour of assembly and I'll be test driving! Once the fibreglass parts are in place I'll build a hood (bonnet) for the car. This shouldn't take long, just a lot of careful measuring so I don't have to buy another big sheet of aluminum!
entry 510
July 28, 2004:
Big news!
The body parts are painted already! They look spectacular. They need wet sanding to smooth out the finish but the colours are awesome. The front fenders are a metallic BMW black while the rest of the body is Lotus "Chrome Orange". In the sun it's blinding. Lotus paints are extremely expensive and I'm in a little shock there, but this will encourage me to do the paint justice in both finish and attention to detail. Kids, if you buy a Lotus Elise in Chrome Orange, do NOT scratch it. If I'd been smart enough to ask about paint costs I might have ended up with a Daytona Blue car. Naaaaah...
entry 511
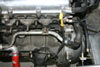 A small tweak to a water line gives more clearance for the header.
This line usually runs on the forward side of the dipstick tube.
entry 512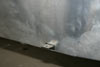 A small hole needed to be cut in the side panel to fit the exhaust bracket.
entry 513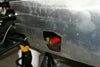 The cutout for the header exit.
entry 514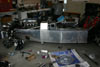 Side panels in place!
entry 515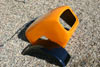 The body parts are painted! That's a BMW metallic black for the front fenders and Lotus Chrome Orange for the other parts.
entry 516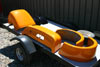 All of the parts out in the sun.
entry 517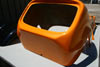 This shot of the nose shows a bit of the pearl in the orange.
The camera is confused by the bright sign and obnoxious colour.
entry 518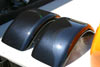 BMW carbon black mica - it's a pretty colour with some good depth.
entry 519
July 29, 2004:
The car looks fantastic!
Of course the first thing I did when I got home was put some of the panels on. Bill Cardell showed up at my garage door to help out and to hang out. We had fun taking my project and making it look like a real car. It's a difficult colour to photograph indoors but I've found that to be true of all Lotus colours - they need the sunlight to really light up. Kind of ironic when you consider the weather in the UK.
I've been concerned with rock "stars" in the fenders. Suggestions have ranged from closed-cell foam to bonded aluminum to "don't worry, the CMC fenders are nice and thick". I'm not 100% sure what my final answer will be - the latter is my favourite because it's cheap and I can bolt everything together right now, but I'd hate to damage that paint.
entry 520
 The header in place along with the side body panel.
entry 521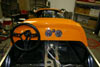 The dash with one mirror and the gauges.
The speedometer is missing the needle, yes.
entry 522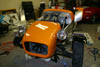 The front body panels in place.
The wheel is not bolted on so it's sitting a little crooked.
entry 523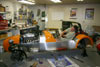 You can almost hear the "vroooom vroooom squeeeeeee!" noises I'm making.
entry 524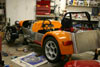 Wow.
Wow.
It almost looks finished.
entry 525 One happy camper.
entry 526
<< | show individual entries | >>