build diary
<< | show individual entries | >>January 21, 2004:
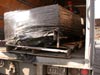
It's here!
There was much excitement in the shop when the crate arrived. You can see the photos. Unfortunately, the crate was badly beaten during shipping. The car arrived mostly unscathed, but there were two suspension brackets that were bent slightly. That's an easy repair. More disappointing is the fact that the nose cone was damaged. Steve at CMC says that one of the shippers walked on top of the crate - ouch! There's also a mysterious cut in the nose that looks like it was done with a saw and we can't explain that one. The fuel cell was not in the crate but CMC tells me now that it wasn't shipped. I later realised there were no stays for the fenders either, so I'm waiting to hear about that. Overall, the welding looks good and the frame seems well made.
So, progress last night? Well, we welded in the roll bar. The fitment wasn't ideal but we were able to make it work with some effort. We also played around a bit with a spare engine, making a "car" out of the bits and pieces we had. Wouldn't you?
entry 40
 It's here!
It's here! But I'm not terribly excited about the state of the crate. Update: Steve at CMC says this is only the second crate to take any damage in shipping out of 300 or so crates. My advice would not be to worry about CMC's packing job but to avoid SAIA Shipping.
entry 41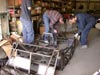 Lots of excitement at the shop as we tear apart the packaging.
Ken and Steve hard at work.
entry 42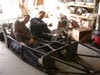 All unpacked, Ken and Steve go for a test drive.
Yes, they're both tall.
entry 43 This isn't good.
The nose cone is cracked. It was well packed and protected, but apparently one of the shippers walked on it! CMC is sending a replacement.
entry 44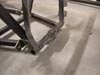 The frame damage from shipping.
The radiator support is tweaked and one of the suspension mounting points is bent. A simple repair.
entry 45 Bill welds on the roll bar.
It's shipped unattached to keep the size down.
entry 46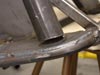 The angles on the roll bar supports were not quite correct.
entry 47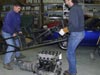 How to install an engine in a Seven.
Tools required: two guys.
entry 48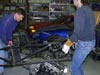 Installing an engine.
entry 49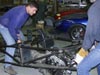 Almost there!
entry 50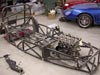 Our spare engine is now "installed".
I believe this process will be a little more complicated when the engine is actually dressed.
entry 51 At this rate, we'll have it done in no time! These are not the wheels that will be used on the final build and I suspect the track is a bit on the wide side.
entry 52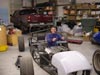 Now it's my turn to go for a test drive!
"Oh no, that invisibile sealer from POR-15 doesn't work the way I thought it did. Now I have to wear pants when I drive!"
entry 53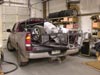 Disassembled once again, it's into the truck we go.
entry 54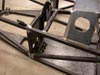 The first puzzle - brackets for floor-mounted pedals.
But the Miata pedals are hinged at the top. Hmm. Turns out the Miata pedals will not fit with the exception of the accelerator.
entry 55
January 22, 2004:
CMC is sending a replacement nose due to the damage.
They tell me they've never seen a crate get pounded like that. It's the first time they've used SAIA for shipping and will definitely be the last. Nothing that was damaged is going to hold me up.
Last night, I started work on the suspension. Cleaning up threads, doing rough assembly and generally familiarising myself with the design. The control arms are solidly made and will offer a bewildering amount of adjustment for alignment. It'll take me a while to get this thing dialed in but it's going to be an excellent learning experience. The upper ball joint hole in the front uprights needs to be drilled out in order to fit the rod end - that was done this morning.
More thoughts on brakes - I think I'm going to fit a pair of Wilwood pedals for the brake and clutch. This will also let me run two separate master cylinders for the brakes with a balance bar - a better way to do brake balance than using a proportioning valve. Given the fact that my old master cylinders probably need a rebuild (the downside of getting a donor car that's been wrecked for 5 years), it's not going to cost much more. Hey, I got the donor for free so I'm not complaining!
entry 56
 Cleaning up the threads in the control arms before installing the rod ends.
entry 57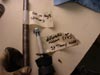 While the kit didn't come with instructions (it's a very early one), these labels sure helped to clear up some mysteries.
Thanks, CMC.
entry 58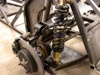 I put together the rear suspension for general layout.
Looks like I will need a bushing for the top of that upright - CMC had said no, but I think that might have been a bit of a miscommunication. I happened to find two bushings that were exactly what I needed kicking around Flyin' Miata.
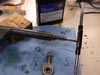
entry 59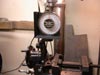 In order to install the upper control arm, I need to drill out the tapered hole for the upper ball joint used in the stock suspension.
Careful measuring makes sure this hole is straight!
entry 60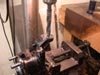 Make sure you use lots of cutting oil if you want to keep your drill bits.
The little burning pieces of metal make fun smoke trails this way, too.
entry 61
<< | show individual entries | >>