build diary
<< | show individual entries | >>April 11, 2004: 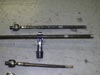 The first modified tie rod is on top.
The pipe in the middle has the threaded fitting pressed into place (awaiting a weld) and an unmolested stock Miata tie rod is on the bottom. I left about 6" (15 cm) of the stock tie rod inside the tube for extra strength and put a few spot welds along the length.
entry 222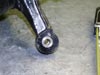 In order to fit the 7/16" bolts into the tapered ball joint bolt in the steering knuckle, I drilled the hole out to 9/16" and put in some bushings that we use for a Flyin' Miata part.
They're a nice snug fit and the stainless steel will resist wear nicely.
entry 223
April 12, 2004:
The steering is all in place and functions.
It's childish fun being able to sit in a seat, turn the steering wheel and see the wheels move back and forth - but I don't care! The teflon pillow block was used in place of the intended rod end to support the column. Rod ends of that size are very expensive. The teflon part cost me $6 and I drilled it out to the exact (metric) diameter of the steering column. The bracket on the frame had to be extended to make it fit but that was easy to do with a piece of aluminum.
I've also had a bit of a puzzling time with front suspension. When setting up for the tie rod measuring, I discovered that one side of the front suspension was binding. I swapped the upper arms from side to side - and discovered that I had one of them installed backwards! Whoops. I installed them both the same way and they worked well. Since I don't have instructions, I had to look at the photos of the GRM build and discovered that now both of them were backwards. Once they were installed correctly, both sides still worked smoothly. I can't explain it. But it works. So, what's next? Probably the dashboard.
entry 224
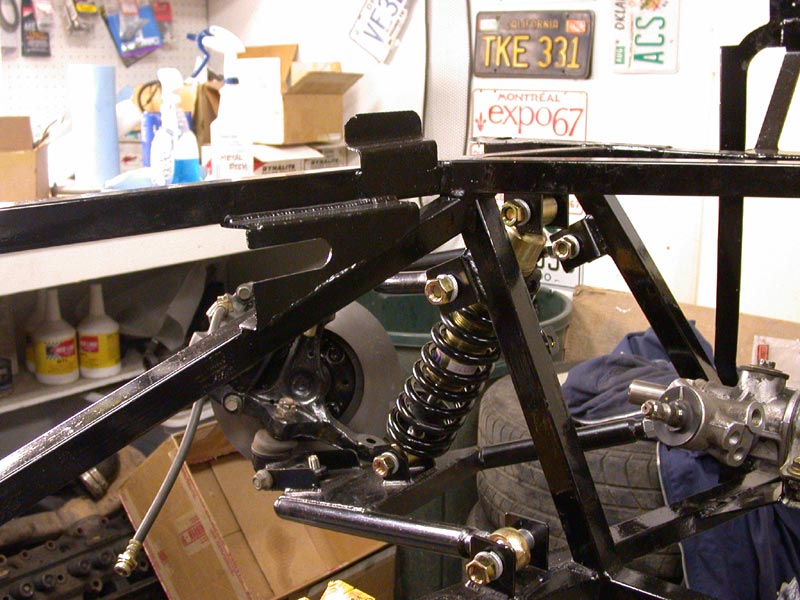
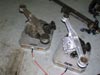
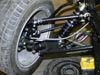 The finished front suspension.
The silver tubes are not part of the suspension, they're a header.
entry 225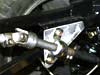 The teflon pillow block that supports the steering column.
I had to extend the bracket on the frame in order to make it fit.
entry 226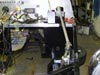 The steering column leaves lots of room for the engine.
And yes, my accelerator pedal is held on with vice grips.
entry 227
April 13, 2004:
Whoohoo!
My fuel cell showed up! It was shipped from JAZ on the 8th. It's a nice looking piece but I don't know how it will fit yet. It is foam filled and has two AN-8 outlets - that's a huge flow capacity! I'm not sure if I'll set up a surge tank like a proper race car or simply use one of the two pickups. Maybe I'll start with one and see if fuel starvation becomes a problem on the track. The pickup location combined with the foam should make it pretty safe. CMC told me the tanks were custom-made, but it appears to be an off-the-shelf tank. The part number confirms this. If I'd known that, I could have had the cell months ago for less money from JEGS. There's also a 5 gallon that might have made a nice compromise between range, weight and cost. No matter what, the arrival of the tank means I can push ahead on a lot of fronts that have been held up.
I pulled the MOMO steering wheel out of my Miata last night to get some final measurements for the steering wheel location. I've got a plan on how to build the adaptor and put the wheel right where I want it. Lots to keep me busy! Oh, I also managed to grab a billet aluminum oil filler cap from a junkyard motor that showed up at work. Aluminum is a dumb idea for an oil filler cap (think about heat transfer) but it's low profile and will help clear the hood.
entry 228
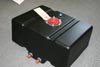 The fuel cell is here!
entry 229
April 14, 2004:
Turns out that Summit sells the same fuel cell under their own brand as well.
The tank fits into the car nicely, but it's a squeeze getting it into place. I had to remove a couple of fittings. No problem there! Since the sump on the bottom of the tank means that the tank isn't flat, I'll have to build some supports for the front of it. Easy enough to do. Last night was spent reading up on surge tanks and generally poking around the back of the car. Ooooh, I'm ready to a lot of work now!
entry 230
 The fuel cell in place.
It's a bit difficult to get in place, but it's nicely sized.
entry 231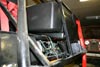 The sump for the fuel pickups means I'll have to make a support for the tank.
Easy enough.
entry 232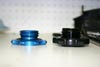 My new, low-profile oil filler cap.
Every little bit helps!
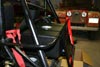
entry 233 Everybody wants a bit of attention.
entry 234
April 16, 2004:
An interesting discovery as I look through my "instructions" - the GRM build photos.
They put the tank in backwards! While this places the pickups at the front of the tank and thus makes them more prone to starvation under acceleration, it should sit the tank down flatter and make it easier to tie down. I'll have to try that. Putting in a surge tank would prevent the possible starvation problems as well as my plumbing problems so that may still happen. Hmmm, so many options.
entry 235
April 19, 2004:
I'm not sure exactly why the GRM tank was installed with the pickups at the front.
It's easier to slip the tank into place but it offers no other packaging benefits - and there's the potential problem of fuel starvation under acceleration (and lots of fuel under braking). So I installed mine with the pickups at the back. A frame of 1/8" and 1/16" aluminum has the tank firmly secured in place with very little weight and a cash outlay of about $12. I'm happy with the way things turned out there.
I also changed the rear end. The super-strong GURU racing diff that was in my street Miata is now in the Seven. The reasoning is that I have to get a custom driveshaft made for the Seven, and I'd rather not discover (like the GRM guys did!) that the smaller, weaker 1.6 ring and pinion isn't up to the abuse the Seven is likely to dish out. My Miata, despite being twice the weight, has survived for years with a 1.6 rear and it's much cheaper to upgrade that car to the 1.8 with off-the-shelf parts should that become necessary. This has added 15 lbs to the weight of the rear end but it's probably worthwhile.
entry 236
 The 1.6 viscous LSD (right) and the 1.8 Guru torque-sensing LSD.
entry 237 The weight difference of the two diffs - 56 lbs vs 71 lbs.
entry 238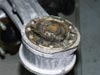 Remember that Shoe Goo stiffening? Well, it didn't survive very long!
entry 239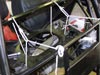 When I installed the last diff, the frame was upside down.
Installing it in the correct orientation took a little creativity.
entry 240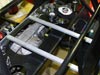 The lower support for the fuel tank.
This is an aluminum U-shaped channel for lots of rigidity and light weight.
entry 241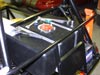 The tank is in.
The upper straps are 1/16" aluminum.
entry 242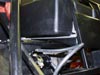 The fuel filter is installed.
The pump will be strapped just above it.
entry 243
<< | show individual entries | >>